Products
Tel: +86-531-58595086
Fax:+86-531-86113759
Mail: admin@jnkason.com
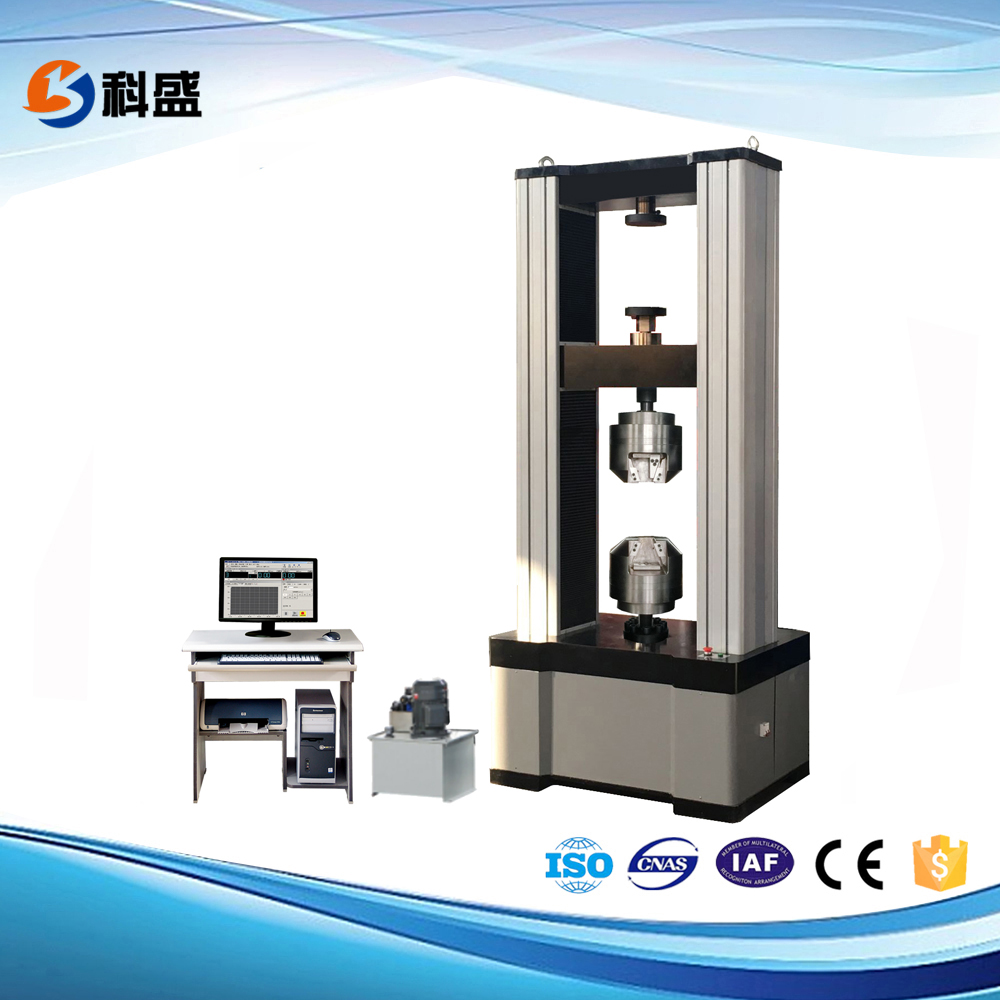
WDW-600 / WDW-600E Computerized Electronic Universal Testing

WDW-600 / WDW-600E Computerized Electronic Universal Testing Machine
1.Application:
It is applicable for wide range of material for tension, compression, bending, shearing and low cycle test.
Suitable for metal, rubber, plastic, spring, textile, and components testing.
It is widely used in the corresponding industries, research and development, test institutes and training centers etc.
2.Standard:
ASTM, ISO, DIN, GB and other international standards.
3.Main Technical Parameters:
Model |
WDW-600 |
WDW-600E |
Max. Load |
600 KN |
|
Structure |
Four-column Floor Model (Upper Is Compression And Lower Is Tensile) |
|
Control Method |
Computer Automatic Control |
|
Load Accuracy |
1 Class |
0.5 Class |
Load Range |
2%~100% FS (12KN~600KN) |
0.2%~100% FS (1.20KN~600KN) |
Motor |
TaiWan TECO AC Servo Motor |
Panasonic Motor, Made In Japan |
Sensor |
High Precision Load Sensor,Made In China |
Import Sensor, Made In USA |
Resolution |
1/300000 |
|
Measuring Range Of Deformation |
2%~100% |
|
Accuracy Indication Of Deformation |
≤±0.5% |
|
Disp. Indicating Relative Error |
≤±1% |
|
Displacement Resolution |
0.04um |
|
Adjusting Range Of Control Rate Of Load |
0.005~5%FS/S |
|
Control Precision Of Control Rate Of Load |
When rate < 0.05% FS/s, the precision is within ± 2% of setting value;When rate ≥ 0.005%FS/s, the precision is within ± 1% of setting value. |
|
Adjustment Scope Of Deformation Rate |
0.005~5%FN/S |
|
Accuracy Of Deformation Rate |
Test Speed<0.05%FN/s, within the ±2% of the preset value,Test Speed≥0.05%FN/s, within the ±0.5% of the preset value. |
|
Adjusting Range Of Displacement Rate |
0.05~200mm/min (Can be customized) |
|
Control Precision Of Displacement Rate |
When rate < 0.5mm/min, within ± 1% of setting value;When rate ≥ 0.5mm/min, within ± 0.5% of setting value. |
|
Scope Of The Consistent Load Deformation
|
0.5%~100%FS |
|
Accuracy Of The Consistent Load Deformation
|
Preset value≥10%FN, within the ±0.1% of preset value;Preset value<10%FN, within the ±1% of preset value. |
|
Tensile Space |
700mm (Can be customized) |
|
Compression Space |
700mm (Can be customized) |
|
Effective Spacing |
650mm (Can be customized) |
|
Load Cell Configuration |
One PC (Max Load).
|
|
Extend Configuration |
Large deformation extensometer,High or low temperature test chamber, High temperature oven. |
|
Power Supply |
AC220V±10%,50Hz (Can be customized) |
|
Grips |
Hydraulic Automatic Grips |
|
Dimension |
1360*1000*2830mm |
|
Weight |
3100.00KG |
|


